Frozen Apples

I love having frozen apples on hand to put in smoothies, desserts, and other fruity treats. Here is what I do to freeze apples:

  • Peel and slice apples
  • Sprinkle apple slices with lemon juice, toss to coat
  • Lay apple slices in a single layer on a cookie sheet
  • Place in freezer
  • Once frozen, place apples in a freezer bag and place back in freezer

Now you can pull out desired amount whenever you need them! Try them in any of these recipes:

An Apple Pie Smoothie for President’s Day

Happy President’s Day! Here is a great treat for today’s patriotic holiday, or for just any ordinary, American day.

Apple Pie Smoothie

Makes 1 smoothie

  • 1 cup almond milk
  • 1 1/2  cup frozen apples (about 1 large apple, peeled and sliced)
  • 2 Tablespoons whole oats
  • 2 Tablespoons walnuts
  • 1-2 Tablespoons vanilla brown rice protein powder
  • 2 teaspoons apple pie spice (or cinnamon)
  • 1 teaspoon agave nectar or honey

Place all ingredients in a blender and mix. Serve and enjoy!

Red Velvet Cupcakes au Naturel (i.e. – No food coloring!)

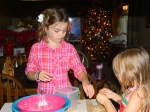
Anna requested red velvet cupcakes for her birthday. The thought of pouring bottles (yes, that is plural) of red artificial dye into her cupcakes was enough to send me searching. I am glad I did because I found this WONDERFUL recipe that uses beets to create a moist and red-colored cake. These cupcakes received rave reviews, and this is a recipe that will be used again! So thank you to sophistimom for all the time you took to put together and post this recipe! And thank you to God for giving us such rich and vibrant food that is both a treat to the tummy and to the eyes! I have reposted the recipe, but be sure to check out her sight for some extra tips and beautiful pictures (she made a layered cake).

Red Velvet Cake

(I used 3 medium beets and it was exactly 1 1/2 cups pureed. Also, I used just 2 tablespoons of cocoa, reduced-fat cream cheese, and organic sugar. It made 2 dozen cupcakes.)

2 large beets (enough for 1 1/2 cups puree)
1/4 cup freshly squeezed lemon juice
1 tablespoon vinegar
2 sticks (16 tablespoons) unsalted butter, softened, but not quite room temperature
1 8 ounce package of cream cheese, softened slightly
2 1/3 cups sugar
4 eggs
1 1/2 teaspoons pure vanilla extract
2 cups unbleached all-purpose flour
1 1/2 teaspoons baking powder
1 1/2 teaspoons kosher salt
4 tablespoons natural (not dark or dutch processed) cocoa powder*
cream cheese frosting (recipe on sophistimom)

1. Preheat oven to 350 degrees (165 degrees celsius). Place beets in a small baking dish and add a 1/2 cup of water. Cover with parchment paper and foil, and roast until quite tender, about 60-90 minutes. Allow to cool completely.

2. Butter 3 8 inch cake pans. Cut out parchment paper circles and place in the bottoms of the pans. Butter the parchment paper and dust with flour. Set aside. Peel the beets and cut into large chunks. Place in a food processor (or a very good blender) with the lemon juice, and pulse until smooth and pureed.** Stir in the vinegar.

3. In a mixer fitted with the paddle attachment, cream together butter and cream cheese. Pour in sugar and mix until smooth. Add in eggs, one at a time, mixing well until each is incorporated. Mix in vanilla.

4. While ingredients are mixing, whisk together flour, baking powder, salt, and cocoa powder in a separate bowl. Slowly add flour mixture to the wet ingredients. Measure out 1 1/2 cups of the beet puree mixture, and fold into the cake batter. Divide the batter evenly between the cake pans. Tap pans on the counter to remove any air bubbles.

5. Bake at 350 degrees for 20-35 minutes, or until a toothpick inserted into the center of the cakes comes out clean. Invert cakes onto cooling racks, and allow to cool completely. Wrap in plastic wrap and refrigerate or freeze until ready to frost.

Sneaking in Chia Seeds

Last month, I made my “top 10” list of foods that I eat daily (or almost daily). One of the items on my list, chia seeds, are a new addition to my diet. I mainly add them to my shakes, but sometimes they top my granola and Greek yogurt. I have begun to “sneak” them into my kids’ sandwiches by spreading a little onto their PB & Js. I buy the seedless all-fruit spread, and simply add the chia seeds to the jam when I am spreading it on the bread. Voila- Omega-3 fats slathered onto their favorite lunch box staple!

You can actually make some chia seed jam since those tiny, little guys are a natural thickening agent. Check out one of my favorite fellow bloggers at The Gracious Pantry for her Strawberry Chia Seed Spread recipe.

My Top “Eat Clean” Tip

I have had two friends in the past week or so ask me for some tips on eating well. So I figured I’d share my #1 recommendation on taking the first step in cleaner eating: fresh fruits and vegetables on the table.

As I prepare dinner and/or lunch, I place fresh fruits and vegetables on the table. My kids know that they are more than welcomed to come up and snack off the tray while their meal is being prepared. I place hummus, yogurt-based dressing, or salsa on the table to go along with the crudite. By the time they sit down to eat their main course, they have eaten a good dose of nutrients, vitamins, and antioxidants!

Cherry Vanilla Granola

I created this granola recipe after I did a bit of research concerning insomnia. Between the unpleasant meds for my eyes and still being in a restless pattern from marathon training, sleep often eludes me in the early morning hours. Last week I discovered that tart cherries and cherry juice, along with oats, have a high melatonin level. This naturally occurring hormone  promotes a healthy sleep cycle. So I’ve paired up this new creation with my favorite plain Greek yogurt in the evenings for the possibility of a good night’s rest. It’s easy on the taste buds too! 🙂

Cherry Vanilla Granola

  • 4 cups whole oats
  • 1 1/2 cups dried tart cherries
  • 3/4 cup chopped walnuts
  • 1/4 cup extra virgin coconut oil
  • 1/4 cup all-natural applesauce
  • 1/3 cup honey or agave nectar
  • 1 tablespoon vanilla
  • 4 teaspoons cinnamon

Mix oil through cinnamon together in a small bowl. In a large bowl, place oats and walnuts. Pour all but 1/4 of the wet mixture over the oats and nuts. Stir mixture together.

Place dried cherries in a small bowl and pour remaining wet mixture over cherries. Stir to coat and set aside. Bake oat mixture on a cookie sheet at 325 for 25 minutes, stirring every 8-10 minutes. Pull out and mix in cherries. Bake an additional5-7 minutes. Cool completely before enjoying.

My New Flavor – Lemon Poppy Seed Hummus!

Here is my latest sweet hummus flavor- lemon poppy seed!It is Aleyah’s new favorite, and we created a strawberry dessert tart with it. Here is our recipe:

For the crust:

Place biscotti in food processor and grind until chopped into crumbs. Add melted butter and mix. Press into a springform pan (8-9″). Bake at 350 for 25-30 minutes. Allow to cool completely.

Prepare Tart:

  • Spread lemon poppy seed hummus over cooled crust and layer sliced strawberries on the hummus. Drizzle with honey or agave nectar if desired. Slice and serve.
  • Check out my other flavors here!

A New Favorite Find – All-Natural Pacific Soups

Pacific Soups is one of my new favorite go-to lunches. I love their tomato soup! Last week I used leftover enchilada fillings and toppings to create my own Mexican soup. I poured just a bit of almond milk into the Pacific tomato soup, added some cooked chicken, chopped spinach, and black beans and heated it through in the microwave. I topped it with shredded 2% cheese, avocado, and plain greek yogurt.

Since tomatoes are a base in several different international cuisines, you can definitely vary this to fit your liking.

  • Add some veggies and whole grain pasta for Italian minestrone
  • Add some lentils, onion, and garlic along with garam masala, ginger, and curry to create an Indian bowl of goodness

Pacific’s Garden Tomato Herb Soup- your blank canvas for a quick and healthy meal!

S’mores Doughnuts (Gluten Free!) For My Kids

For Christmas, Aleyah, my six-year-old,  received a “doughnut basket” under the tree. In it was:

  • Babycakes Covers the Classics Cookbook
  • A Bella Cucina Mini Donut Maker
  • A mixing bowl and a spatula
  •  Sprinkles and chopped nuts

On New Year’s Eve, we had the opportunity to give this no-fry donut maker a test drive. We had fun and it turned out to be a delicious little treat! I chose a gluten-free cookbook because I love giving my family more than just wheat-based products. I used the plain donut recipe which calls for garbanzo bean and fava bean flour as well as brown rice flour. (She recommends Bob’s Red Mill flours)

After the 7 minutes or so it took to make 7 donuts, we let them cool a bit and then dipped the tops into our dark chocolate sauce (see below), placed several organic mini marshmallows on the chocolate, and then crushed graham crackers (NOT gluten-free) to finish our indoor “s’mores”. My favorite part of the night? EVERYONE in the house that night, even those who “oppose” healthy food (we kept the recipe to ourselves), enjoyed every bite!

I highly recommend this cookbook. From breakfast to savory crepes to redos of our favorite treats, this NYC baker has a great insight into creating delicious creations.

FYI – I did discover that xanthan gum is a standard binding ingredient in gluten-free recipes, and that it is expensive! I did a little research and discovered I could use milled flaxseed in its place. For these little donuts, it seemed to work out find. If we had a gluten-free need in our house, I would have invested in it, but since this is an occasional switch for our family, I was happy to find this substitution.

Dark Chocolate Sauce

  • 1 cup dark chocolate chips
  • 1 tablespoon oil (extra light virgin olive oil, extra virgin coconut oil, or canola oil)

Place both ingredients into a microwave-safe bowl. Melt chocolate in 30-second intervals, stirring after each time until chocolate is completely melted.

A Wintery Kids’ Cooking Class – Day 2- AND Summer Camp Dates!

Today, on this coldest day of the season, we created our own enchiladas and ended on a sweet note with our Mexican hot chocolate! The girls had the opportunity to fill their tortillas with a variety of fillings:

  • reduced-fat cream cheese
  • shredded 2% cheese
  • shredded chicken
  • spinach
  • tomatoes
  • black olives
  • black beans
  • corn kernels

I used my chicken verde enchilada recipe as a basis for our lunch today, but since each child is particular about their likes, I gave them the opportunity to be creative with their own enchilada. Giving them a choice is almost a guarantee that they will eat what you serve!

And to add some sweet warmth to this chilly day, we brewed up some Mexican hot chocolate!

When’s the Next Class?

I am planning on doing two  “camps” this summer. Each 4-day camp will be 2 days of cooking like I did yesterday and today, 1 day of meal planning (the kids will choose from one of three menus) and grocery shopping, and the 4th day will be making what they planned and shopped for. The cost will be $50 per student per camp, or $90 for two siblings. Right now, the tentative dates are:

Tuesday, May 29th-Friday, June 1

and

Monday, June 18th- Thursday, June 21st*

Each day will start at 10:00 and will end at noon. This is a hands-on class where they learn cooking and baking techniques, how and why to make healthy food choices, and have the opportunity to enjoy and savor their handiwork!

*Due to my husband traveling 4 weeks out of the summer, these dates are subject to change.